


Do you want to minimise the app uninstall rate? Are you interested in minimising user attrition and maximising the ROI on every acquired user? If yes, then you need to control your app crash rate as 71% of the uninstalls are attributed to mobile app crashes. Yes, the pain in the crash is real. And alongside app crashes, you need to minimise bug occurrences as well. The million dollar question here is, “how do you minimize app crashes?”. Ummm.. for that we need something called as “Appium”. In this insight, we detail out on what’s Appium and share a complete hands-on, step-by-step Appium setup guide for Windows.
Why do we need Appium?
Well, do you recall Dom (Vin Diesel) from fast & furious going on speedy thrilling rides to test the best of the breed luxury cars?
With a similar obsession, mobile test engineers often go on a rough drive to test every single component of your newly built mobile application. They repeat this process more often than they blink their eyes just to ensure they find all the bugs as the iterative app development cycle is in process. This ensures minimal bugs being shipped to the production, and as a result, minimal app crashes.
But repeating the same testing process over and over after every new feature release can often be as boring as driving the same road again and again, right? So, the mobile QA engineers need to eliminate the boring parts of repetitive testing. How? Enters “Appium” – most popular mobile testing automation framework.
Read this insight to find out
- What’s Appium, how it works, and
- How to do the initial setup on Windows.
Let’s get the wheels rolling..
What’s Appium, its architecture, and how does it work?
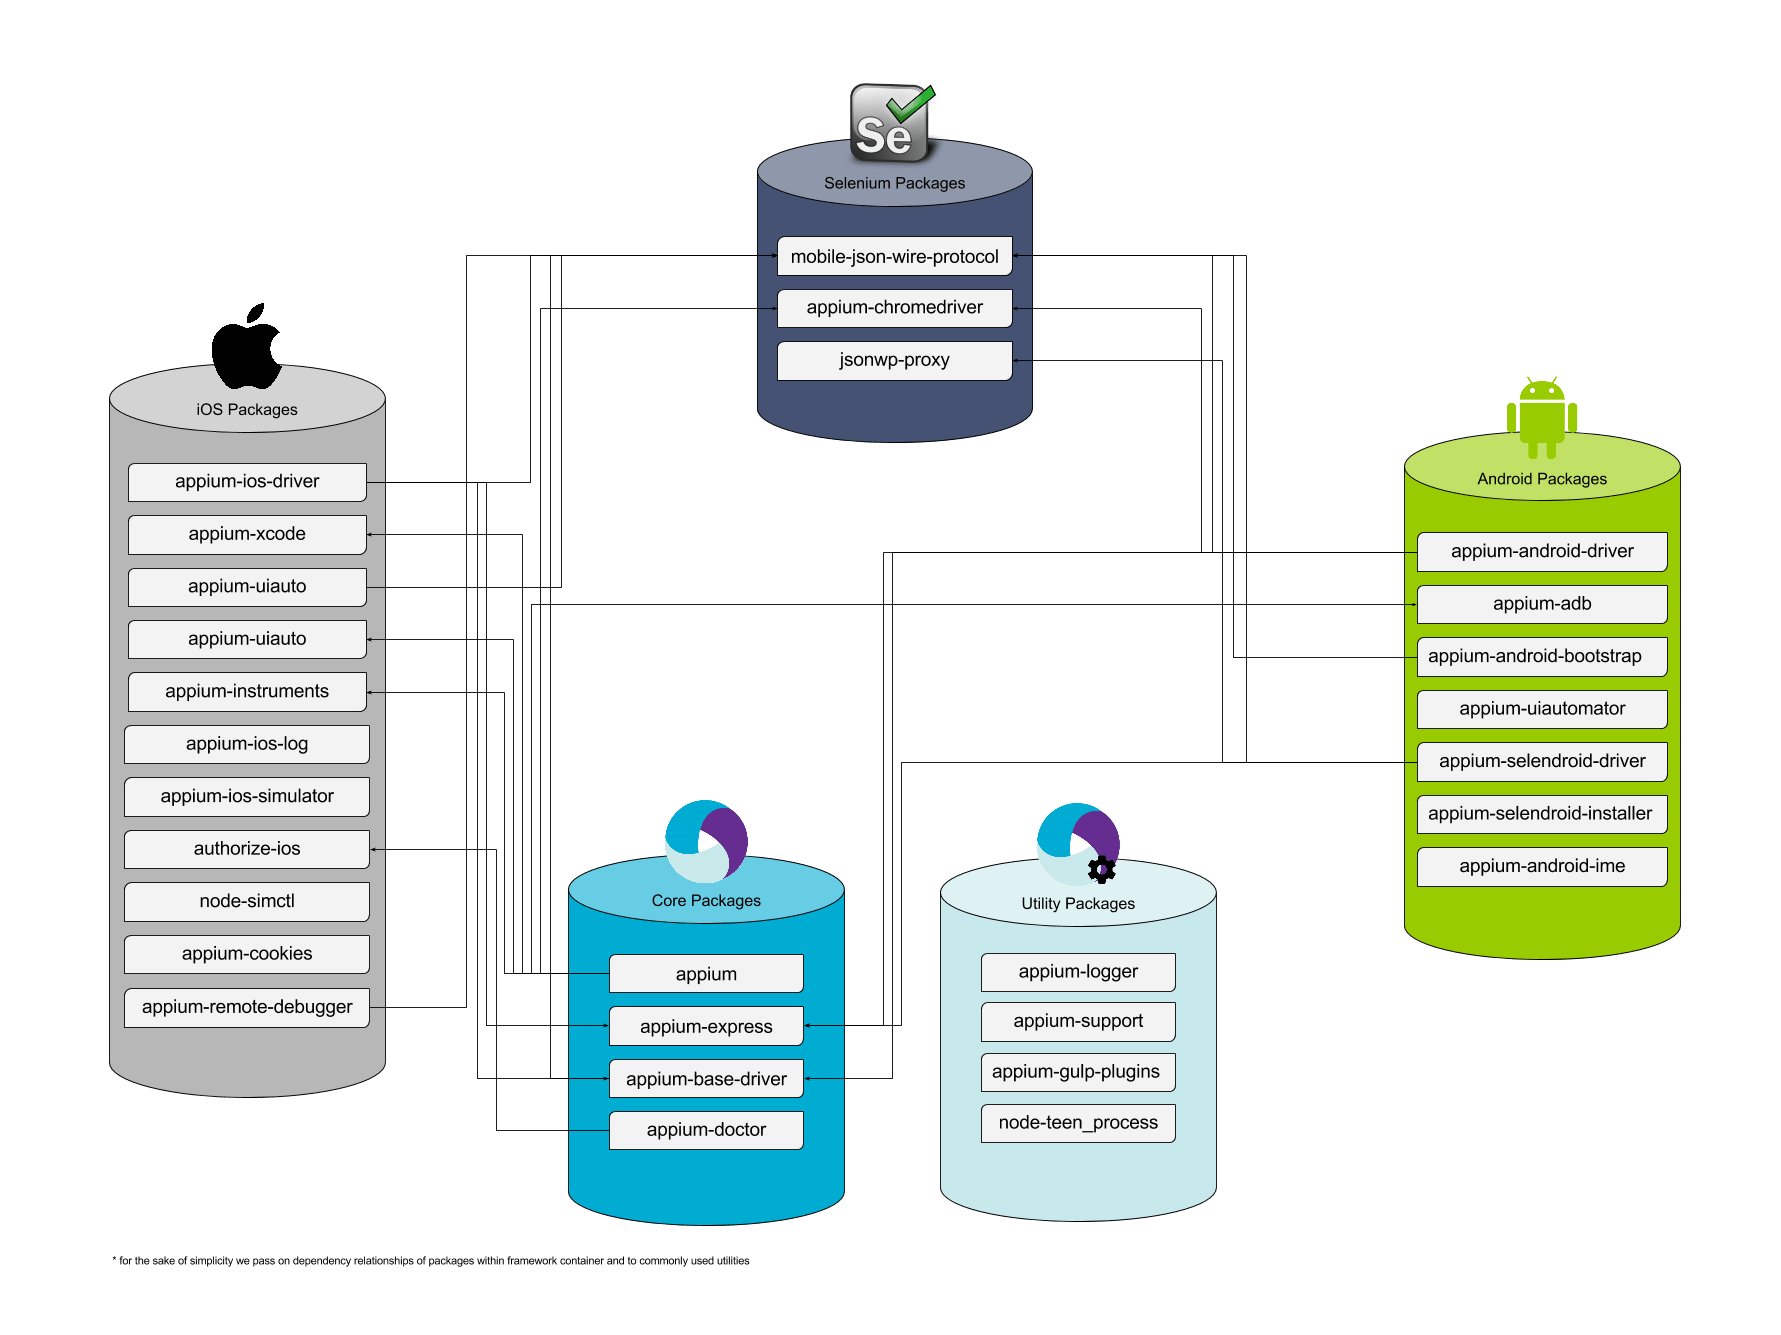
Appium is an open source test automation framework/tool for mobile apps. It is used to test
- Native apps (build using iOS, android SDKs),
- Mobile web apps (apps built for & accessed by mobile browsers like Safari/Chrome), and
- Hybrid apps (built using web technologies, and then bundled into a native wrapper)
A basic Appium project includes 3 components: a client, a server, and an end device/emulator
- Appium Client is the test automation script that test engineers write using the Appium supported programming languages which includes JS, Python, Java, Ruby, C#, Perl, and a few more.
- Appium Server is written in Node.js, and serves as the interaction channel between the client and the end device. This server needs to be installed on the system before a test engineer can run any automated test scripts. Appium server makes use of platform specific guides like XCUITest and UIAutomation for iOS devices, for android, Appium uses UiAutomator/UiAutomator2, and for windows, WinAppDriver.
- Appium End Devices can be actual hardware devices i.e., android, iOS, windows devices or it can be a software that emulates these devices (emulator).
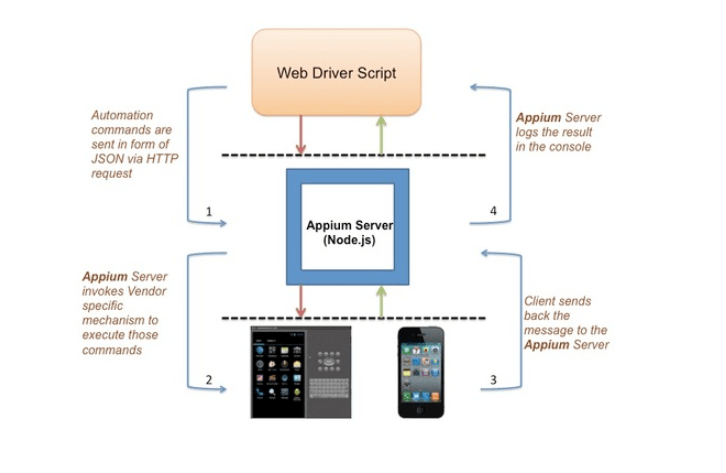
Client script invokes and establishes connection with the server. And then, the client script sends the test cases requests defined by QA engineers in a converted JSON format to the server, which executes them on the end device/emulator. If any bugs are identified, it is logged by the QA engineer and relevant teams work on it to get it fixed.
How to set up Appium for windows?
The process to set up an Appium project, on a high level, is similar for every programming language.
You have the following checklist:
- Properly configured Java 8
- Android SDK & tools
- IDE tool like Eclipse
- Appium dependencies (NPM, NodeJs)
- Developer mode enable Real device, or emulator software
Let’s get this done, one at a time.
Ensure you have JAVA installed & configured on your system,
- If you don’t have Java installed, then download & install the Java JDK from this link.
- Add Java binaries to your environment variable path.
- On Windows, open ‘Control Panel’.
- Click on ‘Advanced system settings’.
- Under the Advanced tab, click on ‘Environment variables’.
- In the dialog box that opens up, under System Variables section, find the PATH environment variable name, click on edit. If you don’t find the variable, add a new one.
- I used the PATH variable name as JAVA_HOME, and I added the PATH value as the binary locations of the JAVA JDK we installed from the above link. For me, the location is C:\Program Files\Java\jdk-12.0.2\bin, expect the path to change based on where you install and the version of JDK you install. You can additionally add the directory as well to the PATH variable. Multiple entries needs to be separate by a semi-colon “;”
Here’s a guide to achieve the same above steps for MAC, Solaris, or Linux.
Android Studio Installation
Install Android SDK, preferably Android Studio from this link, as you would install any other application.
- Go to the directory where you installed the Android Studio, find the SDK directory, copy its path. For me it is -> C:\Users\Lenovo\AppData\Local\Android\Sdk, again, for you the path will be different based on your installation directory.
- Like the previous step, add another environment variable with variable name as ANDROID_HOME and PATH as C:\Users\Lenovo\AppData\Local\Android\Sdk.
- Additionally, add the path to the executable binaries in the sdk\tools folder, and to the tools and platform-tools directory as well. In my case, the four PATH values under environment variable ANDROID_HOME looks like this -> C:\Users\Lenovo\AppData\Local\Android\Sdk; C:\Users\Lenovo\AppData\Local\Android\Sdk\tools; C:\Users\Lenovo\AppData\Local\Android\Sdk\tools\bin;C:\Users\Lenovo\AppData\Local\Android\Sdk\platform-tools
- Only after adding these environment variable values, launch the Android Studio and select basic activity. You’ll have to wait for the gradle sync process to start and complete before you can proceed further.
- Setting the SDK manager tool, once the Android Studio is up and running:
- Select Tools > SDK Manager (Option displays only after gradle sync process completes) > SDK tools > Click on Hide Obsolete packages.
- If already selected, Neglect and continue.
- Creating a virtual device/ Emulator from Android studio:
- Go to Tools > AVD Manager > click on Create Virtual device > Select any device from the listed devices > next > Choose Android versions to be installed on the virtual device (Android 9 or Android 10 will be stable) > select Android package will be downloaded > Click on next > Give a name for the virtual device created > Select portrait > Finish.
- Emulators created will be listed under virtual devices.
- To launch the emulator, Click on the Play icon under the Actions column of the respective device. Wait until the virtual device is launched.
- Alternatively, you can launch emulator from the command prompt as well:
- Open command prompt
- Copy the path to the emulator directory.
- The path in CMD should be till the emulator executable. Here’s how it looks in my system -> C:\Users\Lenovo\AppData\Local\Android\Sdk\emulator
- Now give a command -> path_to_the_emulator>Emulator -avd Name_for_the_virtualDevice
Example: C:\Users\Lenovo\AppData\Local\Android\Sdk\emulator>Emulator -avd Praveenemulator - Wait until Emulator is launched.
Appium Dependencies (NodeJS, NPM)
Install NodeJs from here, it includes the NPM as well. This completes the need for Appium dependencies. Here are the detailed steps:
- Download Node JS from their official website
- Download the version which shows ‘Recommended for most users’
- Install Node.msi (follow instructions on screen to install.)
- Follow the steps defined in JAVA environment variable setup to set nodeJs relevant environment variables. Use the environment variable name as NODE_HOME, and its value as the executable binary path. You may add the binary directory to the path value as well i.e., C:\Program Files\nodejs\node_modules\npm\bin; C:\Program Files\nodejs
Appium Server, Appium Client Jars, and Selenium Jars installation
Appium comes in two packages i.e., Client (Appium-Java client jars) & Server (Appium Server). We’ll first download the Appium server & then the client jars.
Install Appium Server
- Open command prompt – Run as administrator, and execute the following code: >> npm install -g appium

Command to install Appium - If npm was installed properly, and if Appium server is not pre-installed in your system, then executing the above command will successfully install Appium server on your system.

Checking Appium installation - Now, after the command prompt throws a successful installation message, to verify appium installation, relaunch command prompt, and run another command i.e., >> appium.
- If you see a message in the command prompt similar to “appium server started listening on port 4723”, then it is successfully installed. Yayyy!!!!
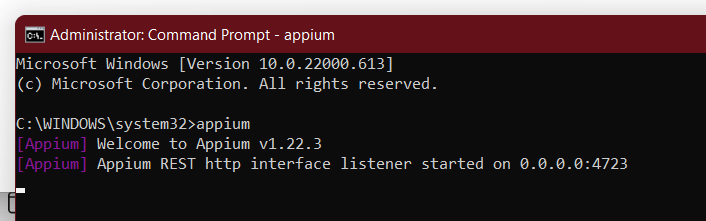
Appium version
Install Appium & Selenium Jars
- To download Appium-Java jars, visit this web link and click on downloads, select Java under the language bindings and download it.

Java jars download for Appium - To download selenium Jars, visit this link, scroll to Selenium client and web driver language bindings, select the Java download link. Extract the downloaded zip to find executable jar files.

Selenium jars - Lastly, while executing the test scripts, you’ll be asked for Commons lang jar files. Download the binaries of the same from this link. Extract the zip to find executable binaries.
Lastly, import all these jars in your project to successfully run a mobile test automation script.
Woohoo!!! Finally, the Appium script installation is completed. Feel free to reach us at hello@codewave.com for any mobile test automation related projects/questions.