


Want your users to fall in love with your designs? Fall in love with your users.
As business leaders, you understand the importance of creating products that resonate with your target audience. But how do you ensure a seamless user experience (UX) that keeps them coming back for more?
The answer lies in the UX design process, a strategic approach that prioritizes user needs at every stage.
A simple way to explain what a UX design is to imagine an ATM that dispenses ……socks! A good UX design would ensure you get the right size, easily, every time.
In a more traditional sense:
UX design, or User Experience design, is the art and science of crafting digital interfaces that delight users and drive business success. It’s all about understanding the needs and behaviors of users to create intuitive, efficient, and enjoyable experiences.
In this blog, we’ll provide you with a comprehensive 10-step guide to optimize your user experience design process, emphasizing its crucial role in driving user satisfaction and business success. Let’s get right into it.
10-Step Guide to the UX Design Process
Before we get started, it’s important to understand that the UX design process is a structured, iterative methodology for crafting intuitive and user-friendly products.
It’s not about magic or guesswork. So make sure your designers thoroughly understand the users and translate that insight into their design work, ensuring the end product genuinely meets users’ needs and expectations.
Note: The following 10 steps are directly addressed to UX designers.
Step 1: Empathize with Users
Before we dive into designing, it’s crucial to understand who you’re designing for.
So first up, we have user research. This initial stage is all about getting into the shoes of your users.
It’s your responsibility to ask them relevant questions and uncover all their needs and pain points.
Techniques:
- Interviews: Conduct in-depth conversations with users to gain qualitative insights into their behaviors, motivations, and frustrations.
- Surveys: Distribute surveys to gather quantitative data on user preferences and attitudes.
- User Observations: Watch how users interact with similar products or services to identify pain points and opportunities.
Deliverables:
- Empathy Maps: Visual representations that synthesize user research findings, highlighting their needs, behaviors, and emotions.
- User Personas: Fictional characters that embody your target user segments, with detailed profiles including demographics, goals, and challenges.
Step 2: Define the Problem
Now that you’ve empathized with your users, it’s time to pinpoint the specific challenges they face.
This stage helps you get a clear understanding of what the product needs to solve.
Moreover, it prevents you from getting sidetracked by addressing less critical issues.
Process:
- Analyze research findings to identify recurring themes and user needs.
- Craft clear problem statements that articulate the specific challenges users face.
- Develop user stories that describe how users will interact with your product to achieve their goals.
Step 3: Ideate Solutions

With a clear understanding of the problem, unleash your creativity to brainstorm a wide range of solutions.
Don’t hold back and don’t be afraid to think outside the box!
Techniques:
- Brainstorming: A collaborative session where ideas are freely generated without judgment.
- Sketching: A quick and visual way to explore different design concepts.
- Ideation Tools: Utilize online tools or card sorting exercises to spark innovative ideas.
Deliverable:
- A shortlist of promising solutions with a clear rationale for further exploration.
Generating creative solutions can sometimes require an outsider’s perspective. That’s where Codewave can make a difference. Our design thinking experts are skilled in facilitating ideation sessions that unlock the full creative potential of your team.
We can help you explore a wide range of possibilities and narrow them down to actionable solutions. Interested in supercharging your ideation process?
Step 4: Create Information Architecture
Now we come to the fourth step – Information Architecture (IA).
The term refers to the way you organize and structure the content and information within your product. Think of it like the blueprint for organizing a library or a grocery store.
In simple terms, the goal here is to organize for clarity.
Process:
- Organize content logically, grouping related information together.
- Design sitemaps: Visual representations of your product’s content hierarchy.
- Craft user flows: Diagrams that map the steps users take to complete specific tasks.
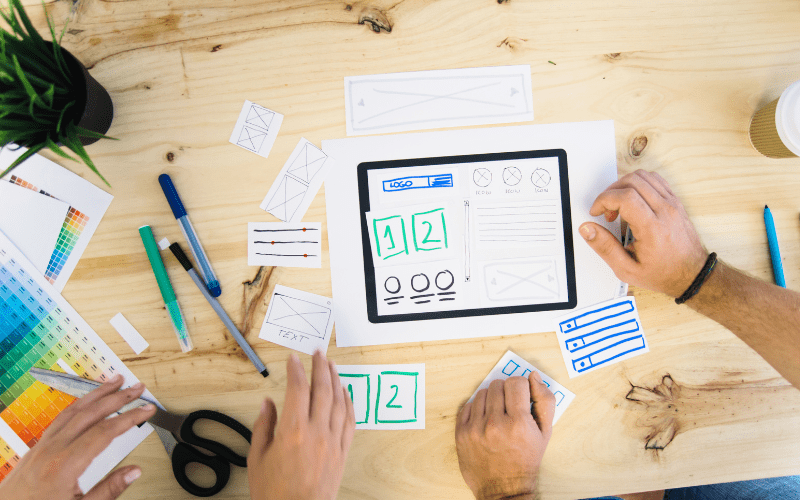
Step 5: Design Wireframes

With your information architecture in place, it’s time to start sketching the blueprint of your design.
Wireframes are low-fidelity representations that focus on layout and functionality. They’re the foundation of your design, providing a clear visual guide for how the final product will look and function.
Process:
- Utilize wireframing tools or even pen and paper to create basic sketches of your product’s screens.
- Focus on functionality and user flow, not aesthetics at this stage.
Deliverable:
- A set of wireframes that provide a clear understanding of the interface structure and user journey.
Here are a few wireframing tools that might be of help to you.
| Tool | Description | Benefits |
| Figma | A popular cloud-based design tool with a wide range of wireframing features. | Collaborative, user-friendly interface, extensive prototyping capabilities. |
| Sketch | A powerful design application offering a variety of wireframing options. | Clean, vector-based output, integrates well with other design tools. |
| Balsamiq Mockups | A web-based tool specifically designed for rapid wireframing. | Simple interface, extensive library of UI elements, and easy collaboration features. |
Note: While we’re focusing on the general UX design process here, it’s important to note that mobile app designing requires special consideration due to the unique constraints and user behaviors associated with mobile devices.
Step 6: Develop Prototypes
This is where you bring your designs to life!
Turn your wireframes into interactive prototypes that simulate the real user experience.
This step is all about refining your design and adding interactivity, allowing users and stakeholders to engage with it.
Process:
- Refine wireframes into high-fidelity mockups that resemble the final product’s look and feel.
- Utilize prototyping tools to add interactivity, allowing users to navigate through the design.
- Consider accessibility throughout the process, ensuring prototypes are usable by everyone.
Deliverable:
- Interactive prototypes that provide a realistic simulation of the user experience.
Step 7: Conduct Usability Testing
Now that you’ve got the prototypes running, one thing that needs to be done before finalizing the design is to put it to the test.
Usability testing with real or representative users will uncover any issues that need addressing.
Process:
- Observe real or representative users interact with your prototype.
- Analyze user behavior to identify areas of confusion or frustration.
- Gather feedback through surveys, interviews, or observation notes.
Benefits:
- Uncovers usability issues early in the design process, saving time and resources.
- Provides valuable insights directly from your target audience.
Step 8: Finalize Design Handoff
With step 8, it’s time to prepare your final designs and documentation for development, thereby equipping your developers for success.
Your responsibility here is to ensure the design is accurately translated into the final product. This step is crucial for a smooth transition from design to development.
Process:
- Develop comprehensive design documentation that outlines the final design specifications, user interface (UI) elements, and interaction guidelines.
- Consider using design systems: A collection of reusable UI components and style guides that ensure consistency across your product.
- Conduct a design walkthrough with developers to address any questions or clarifications.
Read: Understanding the Product Design Process and its Key Stages
Step 9: Launch
It’s time for the big reveal! Release your product to the world and start collecting real user data.
Process:
- Implement a smooth launch strategy, ensuring your product is readily available to your target audience.
- Monitor initial user interactions through analytics tools and user feedback channels.
Success Metrics:
- Analyze key performance indicators (KPIs) such as user engagement, conversion rates, and task completion times.
- Identify areas for improvement based on user feedback and data insights.
Step 10: Iterate and Evolve
We come to our last step, but the launch is just the beginning. Why? Because continuous improvement is key.
Here, we focus on refining the product based on user feedback and data to ensure a continuously exceptional user experience.
Process:
- Conduct regular usability testing and UX audits to identify areas for improvement.
- Analyze user feedback from various channels like surveys, support tickets, and app reviews.
- Implement changes based on user insights and adapt your design to evolving technology trends.
Remember: The UX design process is an iterative cycle, not a linear one. Be prepared to revisit and refine your design throughout the product lifecycle to create an experience that truly resonates with your users
Conclusion
By embracing the 10-step UX design process, you are investing in a strategic approach that places user needs at the heart of your product development.
As business leaders, it’s imperative to recognize that the creation of a truly exceptional user experience is never a one-time task but an ongoing commitment to your users.
And it’s your responsibility to be patient and supportive with your designers as the journey of UX design is a continuous loop of learning, iterating, and evolving.
Having said that, it’s not necessary that all businesses be equipped with a UX designer to take on this crucial role.
That’s where Codewave comes in. Our UI-UX Design services involve diving deep into understanding your audience to craft immersive experiences that resonate with them. Our mission is to bridge the gap between your brand and your users, fostering meaningful interactions in thoughtfully designed digital environments.
Ready to transform your digital presence and forge deeper connections with your audience? Reach out to us today and take the first step towards a more user-centric future.